2008-01-30
This is an appendix to my larger Personal-Computer Backup article, just above.
(8-Feb-2008 update) Everything on this page works, but I didn't realize until just a few days ago that OS X won't reclaim unused space from a sparse image. You can use the hdiutil command (in a Terminal window) to recover some, but probably not all, the space, but it's extremely time consuming. It took over an hour for my 100GB image. I also tried just creating an encrypted non-sparse image, but Disk Utility took an excessive amount of time for that, and I killed it after more than an hour. So, I'm not sure that these huge disk images are practical. Regretfully, I'm now just writing directly to the drive, unencrypted. If I come up with a solution, or if someone writes to me with one, I'll post it here.
Most Mac backup utilities don't provide a way to encrypt the data, which is important if you're going to transport the drive or store it offsite. However, you can create an encrypted disk image on the external drive, and back up to that. Here's how:
-
Launch Disk Utility (Applications-Utilities-Disk Utility.app).
-
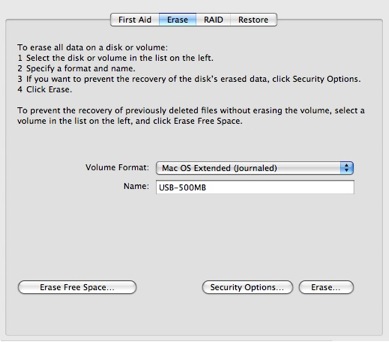
A new hard or flash drive probably came already formatted for MS-DOS.
You can leave it that way, although it's probably better to reformat it for the Mac.
To do that, mount the drive, select it in Disk Utility, choose the Erase tab, select "Mac OS Extended (journaled)", and press the Erase button:
-
Choose File-New-Blank Disk Image to create a new disk image on the external drive.
It brings up this dialog:
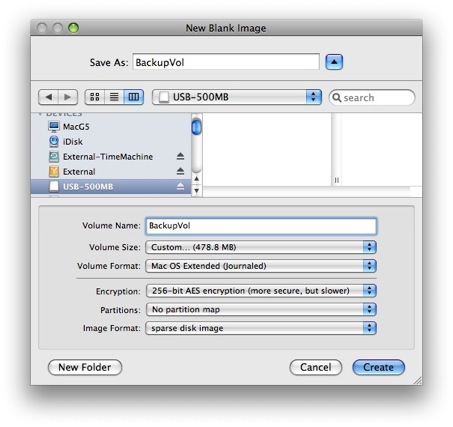
For Volume Size, choose Custom from the drop-down and enter the size of the drive. Disk Utility may slightly reduce that size (e.g., changing it from 500MB to 480.7MB). Also choose the encryption you want (128- or 256-bit), no partition map, and sparse disk image. (Making it sparse allows it to start out small and grow to fill the drive, which is handy if you want to put other things on the drive as well.) Press the Create button.
-
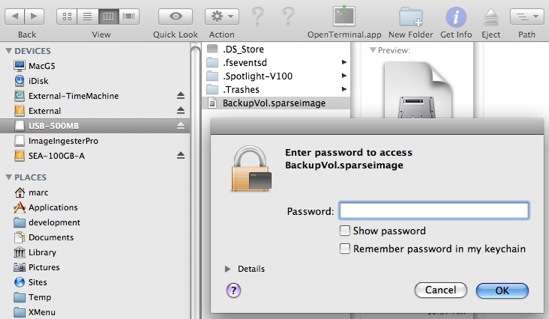
You'll be prompted for a password and whether you want it remembered in your keychain:

-
After the image is created, it will be mounted and you can use the Finder or any backup software to write to it.
When you're finished, eject both the image and the drive from the Finder.
-
To access the image again, attach the drive and it should mount automatically.
The image will not mount.
To mount the image, double-click it in the Finder and then enter the password if it isn't already in your keychain:
Then access the image as before with the Finder or your backup software. Always read or write to the image, not to the drive that contains it (both will be listed).